- All
- Product Name
- Product Keyword
- Product Model
- Product Summary
- Product Description
- Multi Field Search


Views: 0 Author: Site Editor Publish Time: 2025-08-21 Origin: Site


You must follow some key steps to keep dental equipment safe for all patients. First, clean the instruments right after you use them. Make sure they are dry and put them in special packaging. Use a sterilization method like steam, dry heat, or chemical vapor to kill all germs. Always wear gloves, masks, and eye protection when you touch dirty tools. Doing these steps shows how dental instruments are sterilized and keeps your dental office safe for everyone.
Always wash dental instruments right after you use them. This stops dirt from blocking the sterilization process.
Wear personal protective equipment (PPE) like gloves and masks when you touch dirty tools. PPE helps protect you from germs.
Pick the best sterilization method for your tools. You can use steam, dry heat, or chemical sterilization.
Check your sterilization process often with spore tests. This makes sure your equipment is killing germs well.
Keep sterilized tools in a cool and dry place. Storing them right keeps them safe and ready to use.
You help keep your dental clinic safe. Infection control stops germs from spreading. It protects you and your patients. Sanitation best practices help stop diseases. Sterilization kills all bacteria and viruses on dental equipment. This step is very important for infection control.
The Centers for Disease Control and Prevention (CDC) gives rules for dental clinics. These rules help you make your clinic safe. Here is a summary:
Guideline Type | Description |
|---|---|
Standard Precautions | Keeps you and patients safe from bloodborne germs. |
Personal Protective Equipment (PPE) | Wear gloves, masks, eyewear, and gowns to lower risk. |
Sterilization Practices | Handle sharp tools with care and use barriers for safety. |
Infection-Control Program | Write down rules and steps to prevent disease. |
Transmission-Based Precautions | Take extra steps for diseases spread by air or contact. |
Evaluation of Infection-Control Program | Check your infection control plan often to see if it works. |
Good sterilization stops germs from spreading. You clean, pack, and sterilize every tool. Heat sterilize items that touch soft tissue or bone. Use heat or strong disinfectants for items that touch mucous membranes. Cleaning gets rid of dirt that blocks sterilization. Treat all instruments as dirty until you finish sterilizing.
If you skip steps or rush, you put people in danger. Bad infection control can cause health problems. Dirty dental equipment can cause mouth infections. It can also spread diseases in the body. Sometimes, many people needed blood tests after clinics did not sterilize right. Some patients got hepatitis C from reused tools.
Not sterilizing well can cause:
Healthcare-associated infections (HAIs)
Mouth and body sickness
Spread of infectious diseases
Sterilization is not just a simple job. It is your best way to stop germs from spreading. By following the rules, you keep patients, your team, and yourself safe.
You need to protect yourself before cleaning dental equipment. Personal protective equipment, or PPE, keeps you safe from germs and fluids. PPE is needed for every step when getting equipment ready. Wearing the right gear lowers your chance of getting sick.
Here is what you should wear when you clean a dental chair:
Eye protection keeps splashes away from your eyes.
A face mask covers your nose and mouth.
A gown or lab coat protects your skin and clothes.
Exam gloves keep your hands from getting dirty.
Always use PPE when you touch dirty equipment. PPE stops you from touching harmful stuff. You stay safe and your work area stays clean.
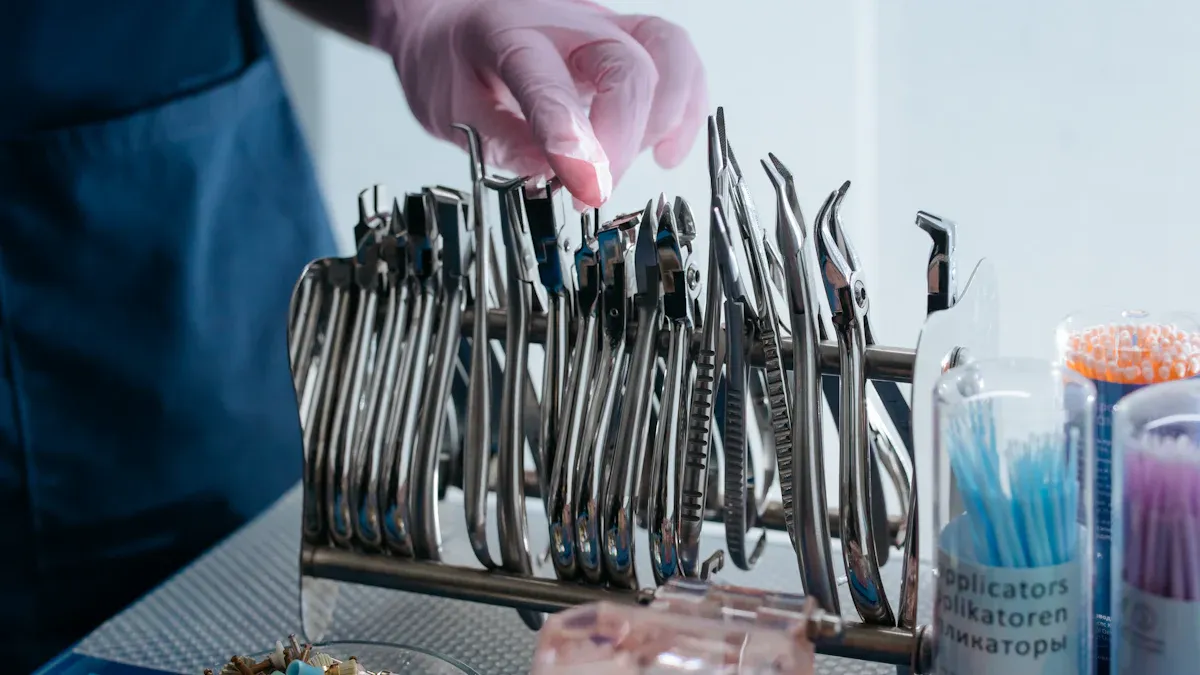
You need to sort and handle dental tools carefully before cleaning. Sorting helps you get rid of all dirt and germs. Keep tools wet so dirt does not dry and stick.
Follow these steps to get a dental chair ready for cleaning:
Put on gloves, a mask, and eye protection first.
Make sure the dental chair is turned off and unplugged.
Take off parts like headrests, trays, and armrests if you can.
Wipe off anything you see with a throwaway cloth.
Sort parts into ‘direct patient contact’ (headrest, armrest, tray) and ‘indirect contact’ (base, lamp arm).
Use the right cleaner for each group.
Let all parts air dry or dry them with a clean towel before putting them back.
Keep tools wet until you clean them. Dry everything before you pack it up. Good sorting and handling help you sterilize well and keep your clinic safe.
You need to clean dental instruments before sterilizing them. Cleaning removes dirt you can see. This step helps sterilization work well. You can clean by hand or use an ultrasonic cleaner. Each way has steps you should follow.
Manual cleaning means you scrub tools with your hands and brushes. This helps you get rid of big pieces of dirt.
Put on gloves, a mask, and eye protection.
Rinse tools under water to wash off loose dirt.
Use a soft brush to scrub each tool. Clean hinges and grooves well.
Rinse the tools again with clean water.
Lay the clean tools on a towel to dry.
Scrubbing by hand can take a long time and be risky. Sharp tools can hurt you. Manual cleaning does not work as well as machines. You might miss dirt in small spaces. Be careful and do not hurry.
Ultrasonic cleaning uses sound waves to clean dental tools. This way works better than cleaning by hand.
Fill the ultrasonic cleaner with the right solution.
Put the tools in the basket. Make sure they do not touch.
Set the timer for 5 to 15 minutes.
Take out the tools and rinse them with clean water.
Dry the tools all the way before sterilizing.
Ultrasonic cleaners make tiny bubbles with sound waves. These bubbles clean places you cannot reach by hand. This way lowers the chance of spreading germs and saves time.
Feature | Ultrasonic Dental Cleaning | Manual Cleaning Methods |
|---|---|---|
Cleaning Efficiency | Better, cleans small spaces | Not as good in tight spots |
Cross-Contamination | Lower risk | Higher risk |
Time Efficiency | Faster (5-15 minutes) | Slower, takes more work |
Always clean tools well before sterilizing. Clean tools help keep patients safe.
You must pick the right sterilization method. This keeps dental equipment safe for everyone. Before you start, dry your instruments well. Drying stops water spots and helps sterilization work better. Put instruments in special packaging. Packaging keeps tools clean until you use them. Use wraps or pouches that let steam or heat reach the tools.
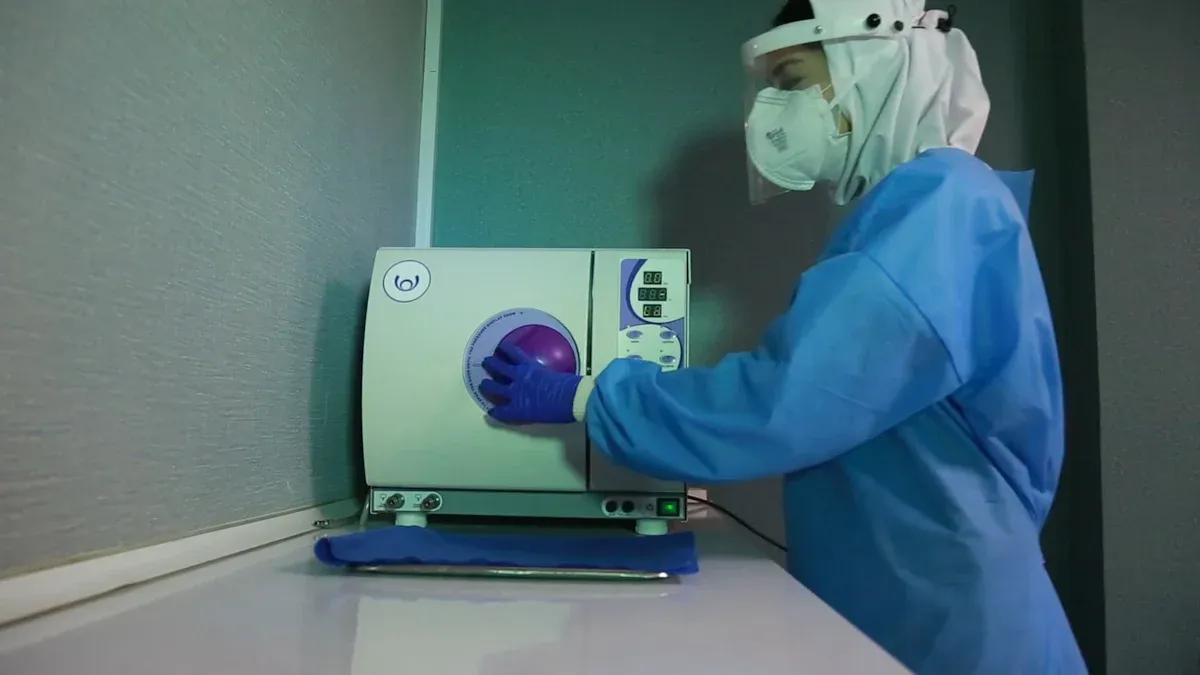
Autoclave sterilization uses steam. It is the most common way to sterilize dental instruments. High-pressure steam kills all germs.
Put clean, dry instruments in sterilization pouches.
Load the autoclave. Do not put in too many tools.
Set the right temperature and pressure.
Start the cycle and wait for it to finish.
Let instruments cool before you take them out.
Temperature (°F/°C) | Pressure (psi) | Duration (minutes) | Use Case |
|---|---|---|---|
250 / 121 | 15 | 15-30 | Wrapped goods |
270 / 132 | N/A | 4 | Pre-vacuum cycles |
275 / 135 | N/A | N/A | Durable items |
Check the autoclave often. If you skip checks, it may not work right. Studies show failure rates can be high. Always follow the manufacturer's instructions. Use the right settings for your dental equipment. Steam sterilization works for most dental tools. Dental Units from FOSHAN KEJU MEDICAL APPARATUS CO.,LTD are easy to clean and sterilize. This helps you keep your clinic safe.
Dry heat sterilization is good for tools that can get ruined by moisture. Carbon steel tools need dry heat.
Put dry, clean instruments in a metal tray.
Set the sterilizer to the right temperature.
Heat at 160°C for 120 minutes or 180°C for 30 minutes.
Let instruments cool before you use them.
Temperature (°C) | Duration (minutes) |
|---|---|
150 | 180 |
160 | 120 |
180 | 30 |
Use dry heat for items that cannot handle steam. Dry heat stops rust and keeps metal sharp. Dental Air Compressors from FOSHAN KEJU MEDICAL APPARATUS CO.,LTD help keep your area dry and clean. This supports the dry heat process.
Chemical vapor sterilization uses strong chemicals. It kills germs on tools that cannot take heat.
Wear gloves, a mask, and eye protection.
Put instruments in a chemical solution like glutaraldehyde or hydrogen peroxide.
Soak for the time listed on the label.
Rinse and dry instruments before you use them.
Follow safety rules every time. Use PPE and be careful with chemicals. Store chemicals safely and follow disposal rules. Chemical vapor sterilization is good for items that cannot take high heat. This method helps you sterilize all kinds of dental instruments, even delicate ones.
Tip: Always check instruments after sterilizing. Make sure they are clean and safe to use.
You should check how you sterilize dental equipment often. Checking helps you find mistakes before they cause trouble. Use a spore test every week to see if your sterilizer works. Match the control for the biological indicator with the same lot number. If you sterilize an implantable device, do a spore test for every load. Write down your test results to show you follow the rules.
Tip: Do not put too many tools in the autoclave. Too many tools block steam and leave some dirty. Always clean tools before you sterilize them. Look at packages for rips or wet spots. Throw away any package that is damaged or wet.
Keep dental instruments sterilized in a cool, dry, closed place. Do not store them near sinks, ceilings, or walls. Never put them under water pipes. This keeps moisture away and helps tools stay clean. Check packages before you use them. If you see damage, throw the package away. Storing tools the right way keeps them safe to use.
Step | Description |
|---|---|
1 | Pre-cleaning gets rid of dirt |
2 | Clean by hand or with a machine |
3 | Rinse and dry everything |
4 | Pack tools in special pouches |
5 | Sterilize with heat or chemicals |
6 | Store in a clean, dry spot |
FOSHAN KEJU MEDICAL APPARATUS CO.,LTD follows ISO13485 and CE rules. These show you can trust their dental equipment to be safe and good quality.
Disposable dental tools help stop germs and keep your clinic safe. You use each tool for one patient and one procedure. After you use it, throw it away. If a tool does not have cleaning steps, use it only once. Disposable tools do not need sterilizing, so you lower the chance of spreading germs.
Single-use tools protect patients from getting sick.
You do not need to sterilize disposable tools.
Disposable tools are not safe to use again.
Note: Disposable dental tools make more trash than reusable ones. They use more materials and create more waste. Use them only when you need to for safety.
You keep your clinic safe by following these best steps. Checking, storing, and using disposable tools the right way helps you keep high standards for dental instruments sterilized.
You help keep dental equipment safe for every patient. If you clean, dry, pack, and sterilize tools, you stop infections. This protects everyone in your dental clinic. New studies say far-infrared radiation and air quality management help tools stay sterile longer.
Keeping sterilization machines working well stops germs from spreading.
Following strict rules from the CDC and ADA keeps patients safe.
Training staff often helps everyone know the best ways to work.
Step | Description |
|---|---|
1 | Clean and heat sterilize all intraoral tools and machine parts. |
2 | Follow manufacturer’s instructions for each device. |
3 | Change your process when new rules come out. |
Always try your best and keep learning about sterilizing dental instruments.
Contact Our Experts for Guidance
You need to sterilize dental equipment after each patient. This keeps your clinic safe and stops germs from spreading. Always use the newest rules for the best results.
Do a spore test once a week. This test checks if your sterilizer kills all germs. Write down your results and look at packages for damage before using them.
No, you cannot use disposable dental tools again. These tools are made for one use only. Throw them away after each patient to stop infection.
If tools are wet, they can rust and not get sterilized well. Always dry tools all the way before you pack and sterilize them.


